The Ultimate Guide to Lazure Painting: How to Create Stunning Lattice Art in 5 Easy Steps
Introduction:
Are you looking for a new and exciting art form to explore?
Look no further than lazure painting!
This ancient technique creates stunning lattice art by painting on a thin layer of glass or plastic. It may seem daunting at first, but with our step-by-step guide, anyone can create beautiful lattice art. In this article, we’ll cover everything from the materials you need to the techniques you should use to create your own lazure paintings.
Materials Needed:
Before you start painting, you’ll need a few basic supplies.
Here’s what you’ll need:
- Lazure paint: You can find lazure paint in a variety of colors and finishes. Look for a high-quality brand that will give you the best results.
- Glass or plastic sheet: This is the base of your lazure painting. It should be thin, clear, and smooth.
- Paintbrushes: You’ll need a few different paintbrushes in various sizes and shapes to create different effects.
- Palette: This will help you mix and match colors as needed.
- Protective gear: Wear gloves, eye protection, and a mask to protect yourself from the fumes.
Step 1: Prepare Your Glass or Plastic Sheet
Before you start painting, you’ll need to prepare your glass or plastic sheet.
Here’s how:
- Clean the surface thoroughly with soap and water to remove any dirt or debris.
- Apply a thin layer of clear sealant to protect the paint from moisture and damage. Let it dry completely.
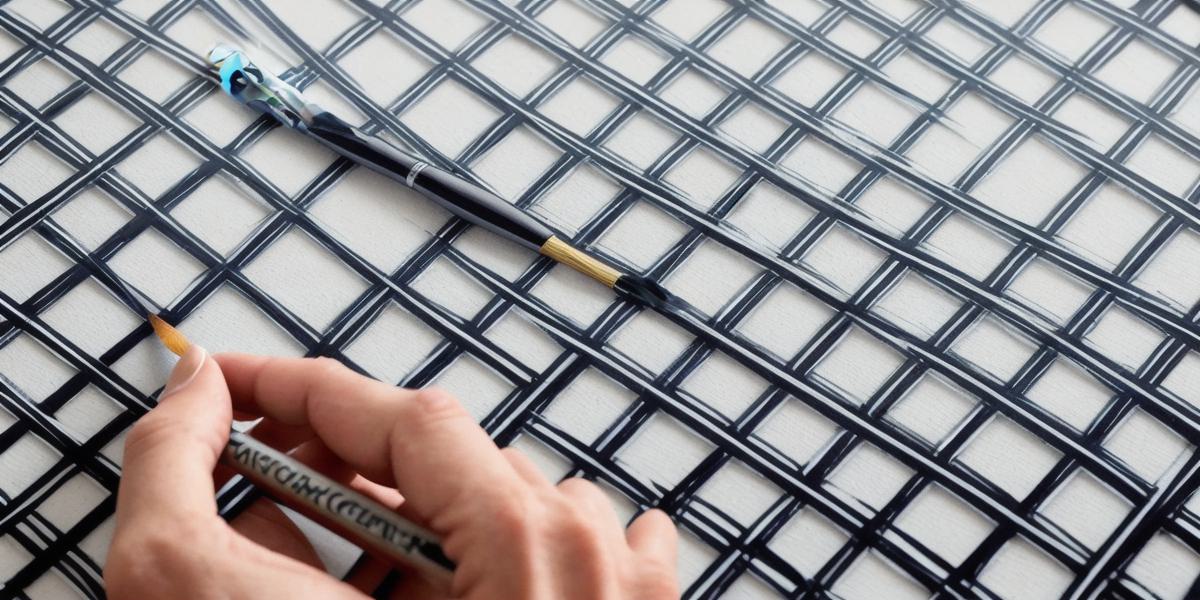
- Use a ruler or straightedge to draw a grid on the surface, dividing it into squares. This will help you create even lattice patterns.
Step 2: Mix Your Paint
Once your surface is ready, it’s time to mix your paint.
Here’s how:
- Start with small amounts of paint and water in a palette cup. Stir until you get a smooth consistency.
- Experiment with different colors and shades to find the perfect combination for your lattice art.
- Use a dropper or piping bag to apply the paint evenly across the surface, following the grid lines you drew earlier.
Step 3: Create Your Lattice Art
Now that your paint is ready, it’s time to start painting!
Here’s how:
- Start at one corner of the sheet and begin painting in a zigzag pattern, filling in each square with color.
- As you move along the grid lines, vary your stroke width and angle to create different effects. For example, use a narrow brush for tight lines and a wider brush for looser lines.
- Take a step back and admire your progress regularly. Don’t be afraid to make mistakes or try new things!
Step 4: Finishing Touches
Once you’ve filled in all the squares, it’s time to add some finishing touches.
Here’s how:
- Use a smaller brush to fill in any gaps or areas that need more color.
- Add some highlights and shadows to give your lattice art depth and dimension.
- Use a clean, dry paintbrush to gently remove any unwanted paint or smudges from the surface.
Conclusion:
Lazure painting may seem challenging at first, but with a little practice and patience, you can create stunning lattice art in no time. With our step-by-step guide, anyone can learn this ancient technique and express their creativity through art.